Showing posts with label clumsy crafting. Show all posts

Friday, April 11, 2014

Clumsy Crafting: Shoe Redo

And now, for another edition of clumsy crafting! Other clumsy crafts have happened on frames, circle scarves and key boxes, and envelopes.

Once upon a time, (literally, only one time) I went to a golf course. Oh wait, technically I worked at a country club one summer and there was a golf course there. But this was the one and only time I actually set foot on the green. How'd I do, you ask? Well, I wasn't even golfing, I was staffing a fundraiser.

Since I was a total golf newbie and had no idea what to wear my friend LJ and I decided to invest in golf outfits so we donned polo shirts and khaki shorts then headed to Target and bought matching $8 white tennis shoes. We spent the day calling one another Victoria and Veronica and speaking in British accents. Obviously that's what golfers do.


Anyway, a few years later and those shoes have spent way more time in the back of my closet than on my feet. Part of my spring fever has involved cleaning, sorting and getting rid of junk! When I came across these old shoes it was either update and change or pitch.

I found this tutorial on Pinterest and used it almost exactly. The Hobby Lobby staff didn't know what crochet tape was so I just bought a normal spool of lace which was only $1 and worked perfectly. I struggled to get the soles out so I just left them in. They aren't as cute but I figure when my feet are in the shoes you can't see them anyway. Mine are also quite a bit darker than hers but I wanted them to hide the dirt a little better.

Basically all you do is remove the laces, boil a huge pot of plain black tea, let the shoes steep for about 15-20 minutes, rinse, dry, throw in the washer and then thread lace instead of shoelaces.


This was surprisingly a really, really easy project for a pretty awesome result! I wore them today to work and they were the perfect spring shoe. It's good to get those creative juices flowing!

What do you think? Would you ever boil your shoes in tea? Would you consider drinking the tea after the shoes had been in it? Yeah... me neither...


post signature


Lil\'Luna

Sunday, May 5, 2013

Clumsy Crafting: Spray Painted Frames

"Thrifting" is not my thing. My sister enters Goodwill and emerges with 2 armfuls of clothes, brand new shoes and adorable purses. I usually find... nothing. I don't love digging through racks or feeling the thrill of a good find so it was really a labor of love when I let my sister drag me into Goodwill on (gasp!) half-off Saturday.

It was c-r-a-z-y. I mean wall-to-wall bargain shoppers elbowing and nudging for that $1 top. 

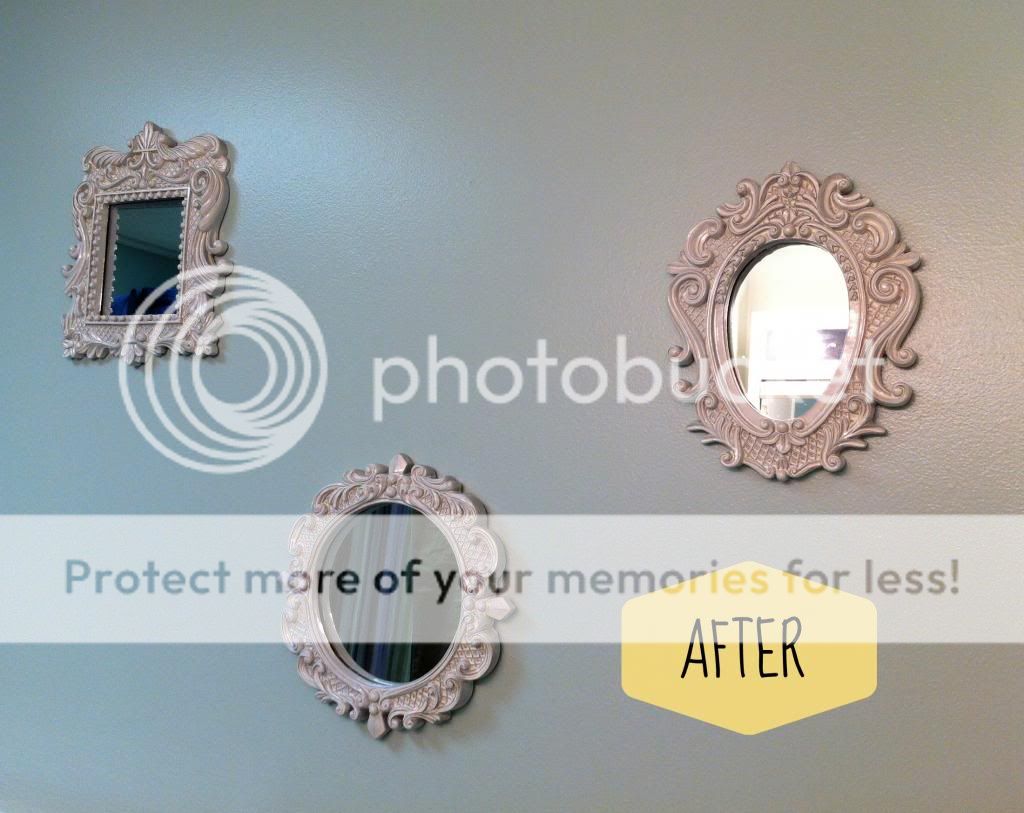
Sure enough, my sister bought about 10 things (including 2 adorable sundresses that I was majorly crushing on) and I bought three hideous and heavy gold mirrors for a total of $4. Bam! 


After a good washing I cut up cardboard and taped it over the mirrors covering the glass. With a trusty can of white spray paint I headed outside and sprayed away! 


The white didn't cover perfectly and I probably could've added another layer but I liked the weathered look of the gold showing through just a little. After a slight drying period I removed the cardboard and... VOILA! 


The mirrors now hang on the wall of our bathroom that has been blank for the almost 3 years that I've lived here. We just painted the mint color a few weeks ago and it was time for some sprucing up! I've been on the hunt for the right decoration for a while and apparently it took getting over my thrift-phobia and a good old can of spray paint to figure it out. 

Clumsy moment of this craft: apparently I did too good of a job taping up the frames because I somehow managed to get cardboard stuck between the mirror and frame in a few places. After using a toothpick, knife blade and exacto knife I still couldn't get it out so if you ever come use my bathroom, don't look too carefully around the edges! 

I must admit I feel a little spray paint crazy wondering what else I can turn colors with the press of a finger. Lamp bases, figurines, picture frames, plastic chairs watch out! I'm coming for you with my trigger-happy finger. Prepare to be painted! 


Sunday, April 14, 2013

Clumsy Crafting: Circle Scarf & Key Box

If you read my envelopes post  or know me, you know that I'm not a huge believer in perfect straight lines or measurements. In cooking I subscribe to the pinch of this, smidge of that philosophy and my tape measure skills are sub par at best. Luckily, I married an analytic man who is infinitely patient and very exact so he makes up for my mishaps.

This week has been one of the most emotionally draining and challenging of my life. In between grieving, mourning the loss of a friend, assisting with funeral preparations, processing and thinking about how to respond and working through a very busy season in my camp life, I needed to do something concrete, light and relaxing.

Enter clumsy crafting! I kind of went easy project crazy this week. There is something very satisfying in starting and completing a project and having something to show for it.

So drumroll please...

Project #1: Jersey Circle Scarf 

I didn't document this because it was supposed to be a half hour project. Rule number one of being a clumsy crafter: it will always take longer than they say. Just keep that in mind. 

But here's how it goes- buy 2 yards of jersey knit material from Walmart clearance section. Or a nicer store if you're one of those fancy people. Fold in half "hot dog style" inside out. (Please tell me you remember learning this in kindergarten? It was right between the tying your shoes lesson and singing 'Who stole the cookie from the cookie jar?') Sew, flip right side out, tuck one end inside the other and sew into a huge circle. 

I would be more specific but to be completely honest I messed it up myself and the first time I tried to put my scarf over my head I realized I had created a giant pillowcase. I walked into the living room with it over my face and my husband burst out laughing and then graciously helped me rip out the stitches and start over. Just read this tutorial like I did and don't lose heart! If I could do, you can totally do this!!  


Project #2: Key Shadow Box

This project is brought to you by the Bed, Bath and Beyond clearance section. Are you sensing a pattern here? It's called C-H-E-A-P.

For $10 I snagged this key shadow box. A few of the keys had fallen and the background was pretty scraped up.

With a little elbow grease I used a variety of tools (some conventional and some less so) to pry the back off and remove the rest of the keys.

And clumsy crafting moment of the project...

Broke 2 keys in the process. Womp womp. Woops. Nothing my trusty hot glue gun couldn't handle!


After putting the keys back together I slapped a little black paint on the original cardboard square, cut a piece of burlap and attached it with spray adhesive and then glued the keys back on. I pounded the back in place and hung it on the wall. Voila!! Quick, easy and oh-so-cute.

There were 2 other projects but we'll save those for another time, shall we?

Moral of the story, go do something creative! Take a risk, use your hands and make something good. Write a letter, sing a song, do a craft, plant a garden, cook something delicious and extravagant. It may be clumsy, it may not be perfect but God's given all of us our own brand of creativity. Have you tried anything new lately? I'd love to hear about your successful and not so successful projects!


Wednesday, March 27, 2013

DIY Envelopes- A Pseudo Tutorial!

I've always been a creative person but of the mind variety, not the hands variety. I can come up with ideas and see them in my mind but when my hands get involved my beautifully, well thought out idea turns into a lumpy, misshapen and sticky mess.

Enter... Pinterest! 

Now I know that many people spend hours trolling through the beautiful images, pinning away and I'm no different. But here's the thing, now that I have plans, directions and pictures to follow I'm suddenly crafty! I usually try 1-2 things a week off Pinterest. Some have been successful and others (homemade jello rollups- more on that later) have been epic fails. 

Here's a little tutorial DIY- pinned it, did it! 

Gotta give credit to the original pin, here.

All you need to start is a magazine page and envelope you're going to copy. 
Fun story- this page came out of a biking magazine and Park Tool is a bike tool company that my husband's grandfather started and now is owned by his uncle. We're sending my brother-in-law a birthday card in a Park Tool envelope- family affair all around! All that to say, pick a page you love for the pictures, pattern or because it reminds you of the person you're sending it to. 


1. Trace the envelope onto the magazine page. You can try to line it up in certain places so the designs show how you like them. On this one, I lined it up so that the park tool emblem would be on the flap of the envelope. It doesn't even have to be perfect (unless you like things meticulous) so trace away! 

2. Cut out the magazine page on the lines and fold it into the existing envelope to get your lines right. 

3. Get yo' glue on and sticky it up! Be careful not to glue the the envelope shut. Been there, done that. 

4. Write your address, add a stamp and to the mailbox it goes! I've sent out about 6 of these and haven't had any problems with non-delivery or returns but if it's a busy pattern I'd slap a white box on the front, just to be safe. 


 VOILA! The finished project! Disclaimer: I am NOT a detailed, perfectionistic (made up word?) person. If you are, I apologize for the stress you are probably feeling due to the mismatched corners. Rest assured, if you trace exactly your envelope will be perfect! 

Let's just take a second and look at this card my handy hubby whipped up for his bro. What a man. 


And there you have it! Cost of this project- FREEEEEEEE!!! 

Here's a little glimpse of some other envelopes I made to send my valentine cards in. 


Send some mail wouldja? It brightens people's days.